- Choose your base: Select a large wooden board, slate, or marble tray. Ensure it’s fully dry and stable on the counter so you can build without shifting. A roomy surface lets colours breathe and prevents crowding.
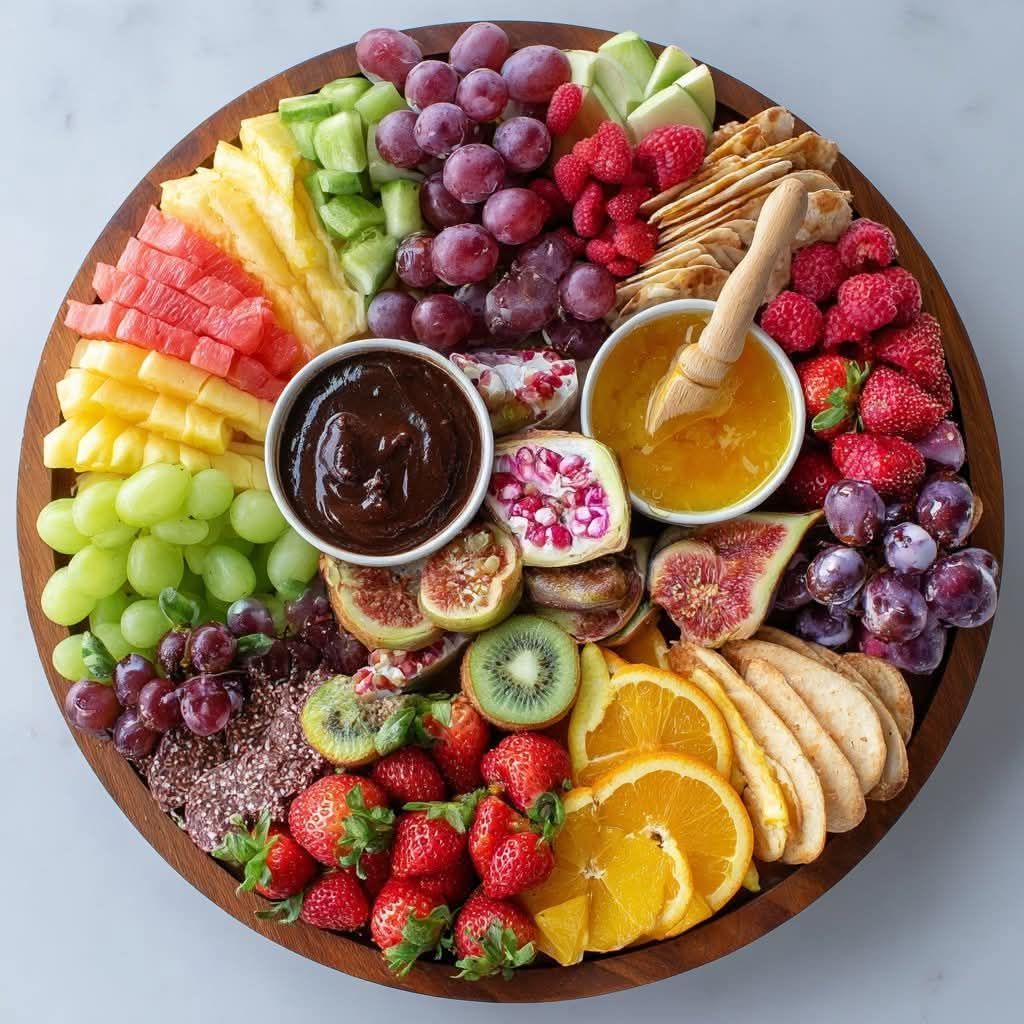
- Place small bowls first: Set out small bowls to hold dips, nuts, or honey. Position them slightly off‑center and spaced apart—these act as visual anchors and help define natural sections for different fruits.
- Arrange by colour or shape: Add fruit in distinct sections so hues contrast (for example, reds beside greens). Keep similar pieces together for impact and to make it easy for guests to grab what they like.
- Fan the slices: Fan apples, mango, and kiwis into gentle curves or S‑shapes. Overlap slices slightly for an elegant, layered look and to protect delicate edges from drying out.
- Cluster berries and grapes: Group blueberries, blackberries, strawberries, and grapes in loose mounds. Clusters add volume and texture; tuck halved grapes cut‑side down so they stay juicy and neat.
- Fill gaps thoughtfully: Use cheese cubes or wedges, dried fruit, and nuts to fill small spaces and add contrasting textures. Keep these items near complementary fruits for easy pairing.
- Garnish: Tuck in fresh mint leaves just before serving for fragrance and a fresh pop of green. Place them sparingly so they accent without covering fruit.
- Serve or chill: Present immediately for peak freshness or chill briefly before presenting. If chilling, cover loosely to prevent dryness and keep aromas vibrant.
Design & Styling Tips
- Balance & flow: Aim for a mix of bold colours and soft tones side by side. Let curved fans lead the eye from one section to the next.
- Height & texture: Bowls introduce height; mounds of berries and clusters of grapes add dimension. Alternate smooth slices with small, bumpy berries for contrast.
- Neat edges: Keep the outer rim tidy by aligning the ends of sliced fruit; a clean edge frames the board and looks professional.
- Negative space: Leave a little breathing room between major sections so each fruit reads clearly and the board doesn’t feel crowded.
- Symmetry vs. asymmetry: Symmetry feels polished; asymmetry feels organic. Choose one approach and commit throughout the layout for cohesion.
Cutting & Prep Notes
- Dry thoroughly: After washing, pat fruit dry so moisture doesn’t make crackers or chocolate (if using) soften and so colours stay vibrant.
- Clean slices: Use a sharp knife for thin, even slices of apple, mango, and kiwi. Slice apples last to keep them looking fresh; fan them immediately on the board.
- Segmented orange: Remove any stray pith from segments so the colour shines. Nestle segments together to keep juices contained.
- Berries first or last: Add delicate berries close to serving so they stay perky; place blueberries where they won’t roll into other sections.
- Cheese & nuts: If including optional extras, cut cheese into bite‑size cubes or small wedges and place nuts in bowls or tight clusters so they don’t scatter.
Serving & Make‑Ahead
See more on the next page
Advertisement
